| 일 | 월 | 화 | 수 | 목 | 금 | 토 |
|---|---|---|---|---|---|---|
| 1 | 2 | 3 | 4 | |||
| 5 | 6 | 7 | 8 | 9 | 10 | 11 |
| 12 | 13 | 14 | 15 | 16 | 17 | 18 |
| 19 | 20 | 21 | 22 | 23 | 24 | 25 |
| 26 | 27 | 28 | 29 | 30 | 31 |
- 안드로이드 개발 강좌
- 구글 안드로이드
- MapView
- 안드로이드 배경화면
- 스카이 안드로이드폰 시리우스 K양 동영상
- 하루 한마디 영어
- sky 시리우스폰
- 구글안드로이드
- 안드로이드 2.0 개발
- 하루한마디영어
- SKY 시리우스
- 안드로이드개발
- 스카이 안드로이드폰 시리우스
- 영어
- 안드로이드 개발 2.0
- 인기있는 블로그 만들기
- 아이폰 배경화면
- 안드로이드 개발
- 구글 안드로이드 개발
- 안드로이드 개발 2.0 강좌
- 안드로이드2.0개발
- android
- 안드로이드 바탕화면
- 안드로이드폰
- objective-c
- Form Stuff
- 안드로이드
- 안드로이드2.0
- 스마트폰 배경화면
- 아이폰 바탕화면
- Today
- Total
moozi
자동완성텍스트뷰( AutoCompleteTextView ) 구현하기 본문
자동완성기능은 검색할 때 검색키워드를 일부만 입력해도( 예를 들면 android 를 검색시 a 만 먼저입력 ) 입력한 문자로 시작되는 단어나 입력한 문자가 포함된 단어들을 쭉 나열해서 보여주는 것을 말합니다.
네이버나 다음과 같은 검색사이트에서 검색할 때 많이 경험해 본 기능일 것입니다.
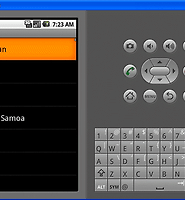
먼저 실행 결과를 잠시 보겠습니다.
처음 실행하면 위와 같습니다. 텍스트뷰에 ko 라고 입력하면 다음과 같이 됩니다.
ko가 포함된 나라 이름들이 검색되는 것을 볼 수 있습니다.
그럼, 안드로이드 개발자 사이트의 내용을 기준으로 살펴보도록하겠습니다.
1. 다음과 같이 이클립스에서 프로젝트를 생성합니다.
2. 왼쪽 프로젝트탐색기에서 res -> layout -> main.xml 을 열어 다음코드를 덮어씁니다.
<?xml version="1.0" encoding="utf-8"?>
<LinearLayout xmlns:android="http://schemas.android.com/apk/res/android"
android:orientation="horizontal"
android:layout_width="fill_parent"
android:layout_height="wrap_content">
<TextView
android:layout_width="wrap_content"
android:layout_height="wrap_content"
android:text="Country" />
<AutoCompleteTextView android:id="@+id/edit"
android:layout_width="fill_parent"
android:layout_height="wrap_content"/>
</LinearLayout>
3. 왼쪽 프로젝트 탐색기에서 src -> my.HelloAutoComplete -> HelloAutoComplete.java 파일을 열어서 다음코드를 덮어씁니다.
package my.HelloAutoComplete;
import android.app.Activity;
import android.os.Bundle;
import android.widget.ArrayAdapter;
import android.widget.AutoCompleteTextView;
public class HelloAutoComplete extends Activity {
/** Called when the activity is first created. */
@Override
protected void onCreate(Bundle savedInstanceState) {
super.onCreate(savedInstanceState);
setContentView(R.layout.main);
AutoCompleteTextView textView = (AutoCompleteTextView) findViewById(R.id.edit);
ArrayAdapter adapter = new ArrayAdapter(this,
android.R.layout.simple_dropdown_item_1line, COUNTRIES);
textView.setAdapter(adapter);
}
static final String[] COUNTRIES = new String[] {
"Afghanistan", "Albania", "Algeria", "American Samoa", "Andorra",
"Angola", "Anguilla", "Antarctica", "Antigua and Barbuda", "Argentina",
"Armenia", "Aruba", "Australia", "Austria", "Azerbaijan",
"Bahrain", "Bangladesh", "Barbados", "Belarus", "Belgium",
"Belize", "Benin", "Bermuda", "Bhutan", "Bolivia",
"Bosnia and Herzegovina", "Botswana", "Bouvet Island", "Brazil", "British Indian Ocean Territory",
"British Virgin Islands", "Brunei", "Bulgaria", "Burkina Faso", "Burundi",
"Cote d'Ivoire", "Cambodia", "Cameroon", "Canada", "Cape Verde",
"Cayman Islands", "Central African Republic", "Chad", "Chile", "China",
"Christmas Island", "Cocos (Keeling) Islands", "Colombia", "Comoros", "Congo",
"Cook Islands", "Costa Rica", "Croatia", "Cuba", "Cyprus", "Czech Republic",
"Democratic Republic of the Congo", "Denmark", "Djibouti", "Dominica", "Dominican Republic",
"East Timor", "Ecuador", "Egypt", "El Salvador", "Equatorial Guinea", "Eritrea",
"Estonia", "Ethiopia", "Faeroe Islands", "Falkland Islands", "Fiji", "Finland",
"Former Yugoslav Republic of Macedonia", "France", "French Guiana", "French Polynesia",
"French Southern Territories", "Gabon", "Georgia", "Germany", "Ghana", "Gibraltar",
"Greece", "Greenland", "Grenada", "Guadeloupe", "Guam", "Guatemala", "Guinea", "Guinea-Bissau",
"Guyana", "Haiti", "Heard Island and McDonald Islands", "Honduras", "Hong Kong", "Hungary",
"Iceland", "India", "Indonesia", "Iran", "Iraq", "Ireland", "Israel", "Italy", "Jamaica",
"Japan", "Jordan", "Kazakhstan", "Kenya", "Kiribati", "Kuwait", "Kyrgyzstan", "Laos",
"Latvia", "Lebanon", "Lesotho", "Liberia", "Libya", "Liechtenstein", "Lithuania", "Luxembourg",
"Macau", "Madagascar", "Malawi", "Malaysia", "Maldives", "Mali", "Malta", "Marshall Islands",
"Martinique", "Mauritania", "Mauritius", "Mayotte", "Mexico", "Micronesia", "Moldova",
"Monaco", "Mongolia", "Montserrat", "Morocco", "Mozambique", "Myanmar", "Namibia",
"Nauru", "Nepal", "Netherlands", "Netherlands Antilles", "New Caledonia", "New Zealand",
"Nicaragua", "Niger", "Nigeria", "Niue", "Norfolk Island", "North Korea", "Northern Marianas",
"Norway", "Oman", "Pakistan", "Palau", "Panama", "Papua New Guinea", "Paraguay", "Peru",
"Philippines", "Pitcairn Islands", "Poland", "Portugal", "Puerto Rico", "Qatar",
"Reunion", "Romania", "Russia", "Rwanda", "Sqo Tome and Principe", "Saint Helena",
"Saint Kitts and Nevis", "Saint Lucia", "Saint Pierre and Miquelon",
"Saint Vincent and the Grenadines", "Samoa", "San Marino", "Saudi Arabia", "Senegal",
"Seychelles", "Sierra Leone", "Singapore", "Slovakia", "Slovenia", "Solomon Islands",
"Somalia", "South Africa", "South Georgia and the South Sandwich Islands", "South Korea",
"Spain", "Sri Lanka", "Sudan", "Suriname", "Svalbard and Jan Mayen", "Swaziland", "Sweden",
"Switzerland", "Syria", "Taiwan", "Tajikistan", "Tanzania", "Thailand", "The Bahamas",
"The Gambia", "Togo", "Tokelau", "Tonga", "Trinidad and Tobago", "Tunisia", "Turkey",
"Turkmenistan", "Turks and Caicos Islands", "Tuvalu", "Virgin Islands", "Uganda",
"Ukraine", "United Arab Emirates", "United Kingdom",
"United States", "United States Minor Outlying Islands", "Uruguay", "Uzbekistan",
"Vanuatu", "Vatican City", "Venezuela", "Vietnam", "Wallis and Futuna", "Western Sahara",
"Yemen", "Yugoslavia", "Zambia", "Zimbabwe"
};
}
위 코드를 보면 COUNTRIES 라는 배열에 나라 이름들을 모두 저장해놓고 AutoCompleteTextView 에서 이 배열을 사용하고 있습니다.
4. Ctrl + F11 로 실행합니다.

[ 실행결과 ]
'안드로이드개발강좌' 카테고리의 다른 글
| GridView 구현하기 (8) | 2010.01.13 |
|---|---|
| ListView 구현하기 (8) | 2010.01.13 |
| 스피너(Spinner) 구현하기 (9) | 2010.01.08 |
| [ 안드로이드 개발 2.0 ] 폼 구성요소(Form Stuff) 5 - 토글버튼(ToggleButton) (6) | 2010.01.08 |
| [ 안드로이드 개발 2.0 ] 폼 구성요소( Form Stuff )4 - RadioButton (1) | 2010.01.07 |


