| 일 | 월 | 화 | 수 | 목 | 금 | 토 |
|---|---|---|---|---|---|---|
| 1 | 2 | 3 | 4 | 5 | ||
| 6 | 7 | 8 | 9 | 10 | 11 | 12 |
| 13 | 14 | 15 | 16 | 17 | 18 | 19 |
| 20 | 21 | 22 | 23 | 24 | 25 | 26 |
| 27 | 28 | 29 | 30 |
- SKY 시리우스
- 안드로이드 배경화면
- 안드로이드폰
- 안드로이드 바탕화면
- 스카이 안드로이드폰 시리우스
- 안드로이드 개발 2.0 강좌
- 하루한마디영어
- 아이폰 배경화면
- sky 시리우스폰
- 안드로이드 개발
- 안드로이드 2.0 개발
- 안드로이드2.0개발
- 스카이 안드로이드폰 시리우스 K양 동영상
- 스마트폰 배경화면
- 영어
- 인기있는 블로그 만들기
- 구글안드로이드
- objective-c
- 안드로이드
- 하루 한마디 영어
- 아이폰 바탕화면
- 안드로이드2.0
- 안드로이드 개발 2.0
- 안드로이드개발
- 구글 안드로이드 개발
- android
- 구글 안드로이드
- MapView
- 안드로이드 개발 강좌
- Form Stuff
- Today
- Total
moozi
Gallery 만들기 본문
Gallery는 이미지등 아이템을 가로로 스크롤 되게 보여주며, 선택한 아이템을 가운데로 위치하게 해주는 뷰(view)입니다.
먼저 Gallery 구현 결과화면을 보겠습니다.

안드로이드 개발자 사이트의 내용을 토대로 살펴봅니다.
1. 먼저 다음과 같이 프로젝트를 생성합니다.

2. 다음 이미지들을 바탕화면에 저장한후 이클립스 왼쪽 프로젝트 탐색기에서 res -> drawable-hdpi 폴더에 마우스로 끌어다 놓습니다.


그러면 다음과 같이 됩니다.

3. 이클립스 왼쪽 프로젝트탐색기에서 res -> layout -> main.xml 을 열어 다음과 같이 편집합니다.
<?xml version="1.0" encoding="utf-8"?>
<Gallery xmlns:android="http://schemas.android.com/apk/res/android"
android:id="@+id/gallery"
android:layout_width="fill_parent"
android:layout_height="wrap_content"
/>
4. 프로젝트탐색기에서 res -> values 에 attr.xml 을 생성합니다. 다음 그림을 참고하세요
먼저 values 폴더에서 마우스 오른쪽 버튼을 눌러 아래와 같이 New -> Other 를 선택합니다.

그리고 XML을 선택합니다.

파일명을 attr.xml 로 저장합니다.

생성된 attr.xml에 다음 코드를 편집합니다.
<?xml version="1.0" encoding="utf-8"?>
<resources>
<declare-styleable name="Gallery1">
<attr name="android:galleryItemBackground" />
</declare-styleable>
</resources>
5. 프로젝트탐색기에서 src -> my.HelloGallery -> HelloGallery.java를 열어 다음과 같이 편집합니다.
package my.HelloGallery;
import android.app.Activity;
import android.content.Context;
import android.content.res.TypedArray;
import android.os.Bundle;
import android.view.View;
import android.view.ViewGroup;
import android.widget.AdapterView;
import android.widget.BaseAdapter;
import android.widget.Gallery;
import android.widget.ImageView;
import android.widget.Toast;
import android.widget.AdapterView.OnItemClickListener;
public class HelloGallery extends Activity {
/** Called when the activity is first created. */
@Override
public void onCreate(Bundle savedInstanceState) {
super.onCreate(savedInstanceState);
setContentView(R.layout.main);
Gallery g = (Gallery) findViewById(R.id.gallery);
g.setAdapter(new ImageAdapter(this));
g.setOnItemClickListener(new OnItemClickListener() {
public void onItemClick(AdapterView parent, View v, int position, long id) {
Toast.makeText(HelloGallery.this, "" + position, Toast.LENGTH_SHORT).show();
}
});
}
public class ImageAdapter extends BaseAdapter {
int mGalleryItemBackground;
private Context mContext;
private Integer[] mImageIds = {
R.drawable.f1,
R.drawable.f2,
R.drawable.f3,
R.drawable.f4,
R.drawable.f5,
R.drawable.f6
};
public ImageAdapter(Context c) {
mContext = c;
TypedArray a = obtainStyledAttributes(R.styleable.Gallery1);
mGalleryItemBackground = a.getResourceId(
R.styleable.Gallery1_android_galleryItemBackground, 0);
a.recycle();
}
public int getCount() {
return mImageIds.length;
}
public Object getItem(int position) {
return position;
}
public long getItemId(int position) {
return position;
}
public View getView(int position, View convertView, ViewGroup parent) {
ImageView i = new ImageView(mContext);
i.setImageResource(mImageIds[position]);
i.setLayoutParams(new Gallery.LayoutParams(150, 100));
i.setScaleType(ImageView.ScaleType.FIT_XY);
i.setBackgroundResource(mGalleryItemBackground);
return i;
}
}
}
소스코드에서 굵은 글씨로 된 곳은 attr.xml 에 정의된 Gallery1을 적용하는 부분입니다. att1.xml 코드에 굵은 글씨부분과 대조해 보기 바랍니다.
참고로 안드로이드 개발자 사이트의 HelloGallery 예제에서는 R.styleable.Gallery1 부분이 android.R.styleable.Theme 으로 되어 있는데 android.R.styleable는 Android SDK 1.0 R2에서 삭제 되었음을 알려드립니다.
6. Ctrl + F11 로 실행합니다.

실행 후 이미지를 선택하면 아랫쪽에 이미지의 index가 출력되는 것을 볼 수 있습니다.
'안드로이드개발강좌' 카테고리의 다른 글
| TabWidget 사용하기 2 - TitleBar 제거, 아이콘추가 (5) | 2010.01.23 |
|---|---|
| TabWidget 사용하기 1 - 기본형 (4) | 2010.01.23 |
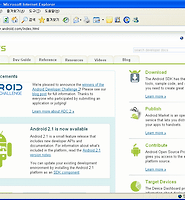
| 안드로이드 개발자 사이트가 IE6.0에서 다시 열립니다. (0) | 2010.01.15 |
| Activity 이야기 (6) | 2010.01.14 |
| GridView 구현하기 (8) | 2010.01.13 |